Wassup Guyz?
Today will talk about Linking Azure Cosmos DB to Azure Synapse Analytics, and then dealing with its migrated data.
As we all know, Azure Cosmos Db had been in the market for quiet a time now. Azure Cosmos DB is a globally distributed, multi-model database service offered by Microsoft. It is designed to provide high availability, scalability, and low-latency access to data for modern applications. It is a fully managed NoSQL and relational database for modern app development, whereby you can store the humongous volume of dataset, allowing them to be easily replicated across regions/locations, in a most effective way.
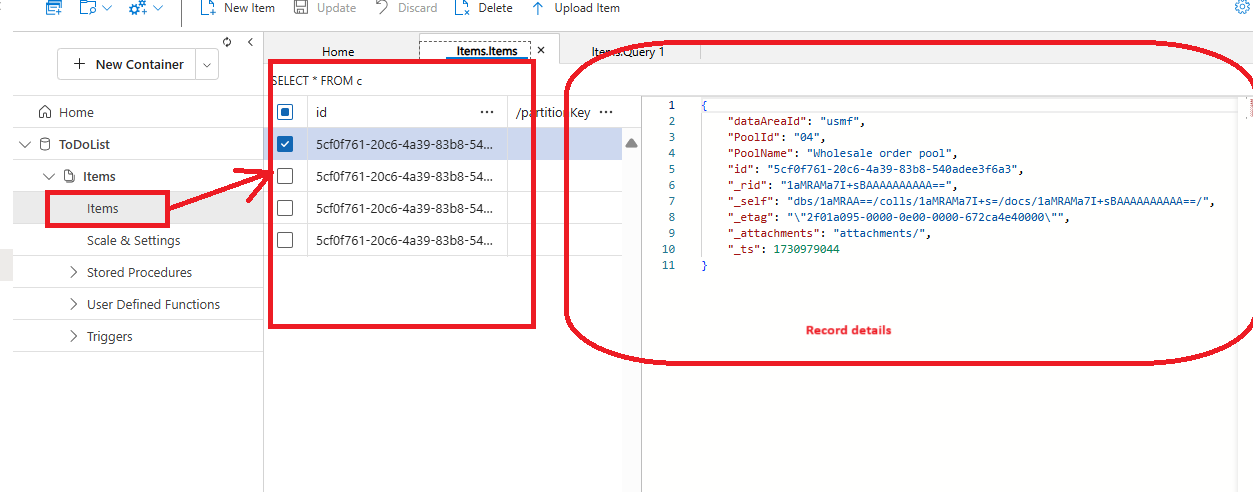
Essentially in a Cosmos DB, we create a Database (we call it a TodoList) and inside it the we keep Tables (called as Items), into which we can keep our records. And as you have rightly guessed, the reccords are stored in form of JSON structures, and you have provision to query the records and even create triggers/stored procs on them.
Creating a Cosmos DB is very straight forward:
Reach out to https://portal.azure.com and search for Cosmos DB:
Select Subscription, Resource group, Location. Optionally you could also choose to apply Free Tier Account.
Click Review + Create to create/deploy a Cosmos DB account.
It will take a while to create and make your DB ready. As stated above here are the Todolist and Item, which got created:
Remember: there should be an id column, which should be unique, rest whatever fields you keep in your JSON file, it will accept that. After Upload, I am querying the CosmosDb:
It's showing the records in JSON format. Alternately you can directly see all the records, by clicking on items themselves:
Under Integration, search for Azure Synapse Link:
Now you have to wait, as the subscription automatically enable the link from Cosmos DB to Azure Synapses.
One done, you would get to see that account has been enabled successfully:
You need to select Containers which you need to enable: as I did in the above figure. This would take a while to activate the containers.
Once done, click on Next:
Select the Subscription, Azure Synapse Workspace (alterantely you can create a New one) and the database foe which you need to link with Azure Synapse.
Click Next to continue.
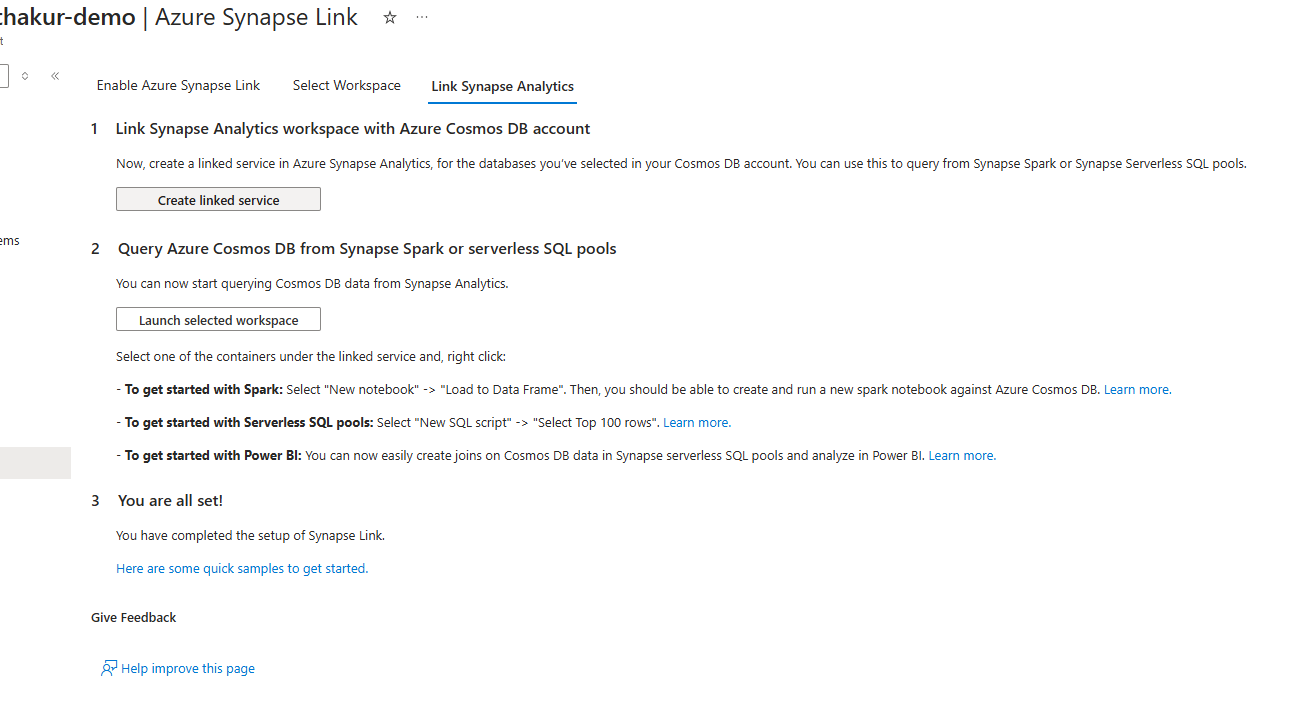
Click on Create Linked Service: this will create a Linked service in the Azure syanpse worksapce. And finally you are all set to go. Click on Launch selected workspace >> it will open the workspace and show the Linked Service thus created:
Now we can explore the data thus created/migrated from Cosmos DB to here. For that you need to create a Spark Pool; you can select an existing pool or create a new one, by clicking on manage pool.
Don't forget to choose the correct vCore size for the pool, else it will give an error: Your Spark job requested 24 vcores. However, the workspace has a 12 core limit.
For this, do the correct calculation of Node size * no. of vCores:
Alternately I can select only specific fields in my query and display it:
import pandas as pd
df = spark.read\
.format("cosmos.olap")\
.option("spark.synapse.linkedService", "CosmosDBLSToDoList")\
.option("spark.cosmos.container", "Items")\
.load()
dfSubSet = df[['dataAreaId', 'PoolId', 'PoolName']]
display(dfSubSet.limit(10))
Where I am specifying the columns like PoolId, PoolName, etc. and storing the result in a dataframe subset. But for that, you need to import Pandas, as shown in the code.
Yes -- that's it for today, I will soon be coming back with another topic on data engineering. Till then, take care and Namaste, as always 💓💓💓


 Like
Like Report


*This post is locked for comments